There is one thing in this world that is constant, and that's the many changing landscapes that surround us. Whether we're in the city, or the country, or the deep woods, even the desert- a landscape is around us. It's even inside us, if we know where to look and how to see it. One can travel the same route everyday, but the landscape will never be same each time. Certain scents can be associated with certain landscapes. Amazing insights can be associated with them, too. The changing of the seasons brings spectacular landscapes, often only lasting long enough for a brief glimpse. But the scene remains, nonetheless.
Tributes to landscapes have been permanently recorded throughout history, from the simplistically lifelike cave drawings clear up to the present day landscape artists, each using their own unique style to interpret what their eyes have seen. Here you will see my particular style of landscape. My interpretation.
Let's take a little walk...
Winter is here. Snow inevitably shows up. It falls on the hills, clumps in the trees, cascades off roofs, only to melt into the streams and rivers. Snow piled up on a barn roof always makes me think of cows snugged down inside, softly breathing in the earthy smell of hay. This landscape happened to end up on a Christmas tree ornament this year.
After getting the snow out of my system, it was time for something a little warmer. And again, it appeared on an ornament.
A young family member saw this ornament and promptly declared that he wanted one. This landscape was a labor of love for a special young lad.
After the holiday 'make it' rush was over, I decided to break my suspension of painting landscapes after a handful of years. Over thirty years ago, I started seriously painting, and landscapes was where I started. Many brushes and canvases were devoured and ruined until finally, landscape painting became a ghostly presence. Now, with more experience from working with other mediums and styles, my 'landscape eye' has sharpened. First off the easel was this 5" by 5" tile (of the peel and stick variety).
Did I watch a lot of Bob Ross? Oh, yes. And before him, William Alexander with his 'happy little clouds'! After much splattering and many muddy canvases, I gave up on the oils. Acrylics and I are much better friends. Even though the learning experience that came with oil painting was excellent, acrylics are much easier to handle. But, that's just me.
Hubby, of course, likes everything I paint, so I did this little tin for him. It's an easily transportable landscape!
Fridge magnets are an attraction, so this tiny painting graces the front of mine.
A friend of mine has recently opened a fabulous new restaurant in town. For the holidays, an eight foot tree stands majestically, supporting ornaments of every shape, size, and color. My contribution adds to the southwest theme of this unique establishment.
Being one who will paint on almost anything, it was time to spiff up the kitchen now that the Christmas decorations were gone. The trim under the cabinets came out fairly well, but there just seemed to be something missing. It needed to be removeable. It also needed to be cheerful. The idea formed and started like this:
The big reveal---- Toaster Art !!
Are your feet sore? Well, let's just sit down and enjoy this quiet little pond. The birch leaves are gently rattling in the warm breeze...
Don't look out the windows! You'll ruin it!!
Toodles.
Tuesday, January 3, 2012
Monday, December 12, 2011
Snowflakes in the Round
I'll be the first to admit it- my wreath talent is pretty much nonexistent. The general ideas are there, to be sure, but when they're done, they are just missing too much. So, I've faced the fact that wreaths and I are just not going to be BFFs. We barely know each other and that's that.
So, why do I keep trying?
Wreaths are just so cool, so neat, so simplistically homey. Who doesn't like a wreath?
A few packages of cute snowflakes from the dollar store called my name, with a blank grapevine wreath whispering at me from home. The idea for a Christmas wreath was born.
This is a simple project, and it didn't tax my tired brain so much that I gave up. It was Plain Jane from the start.
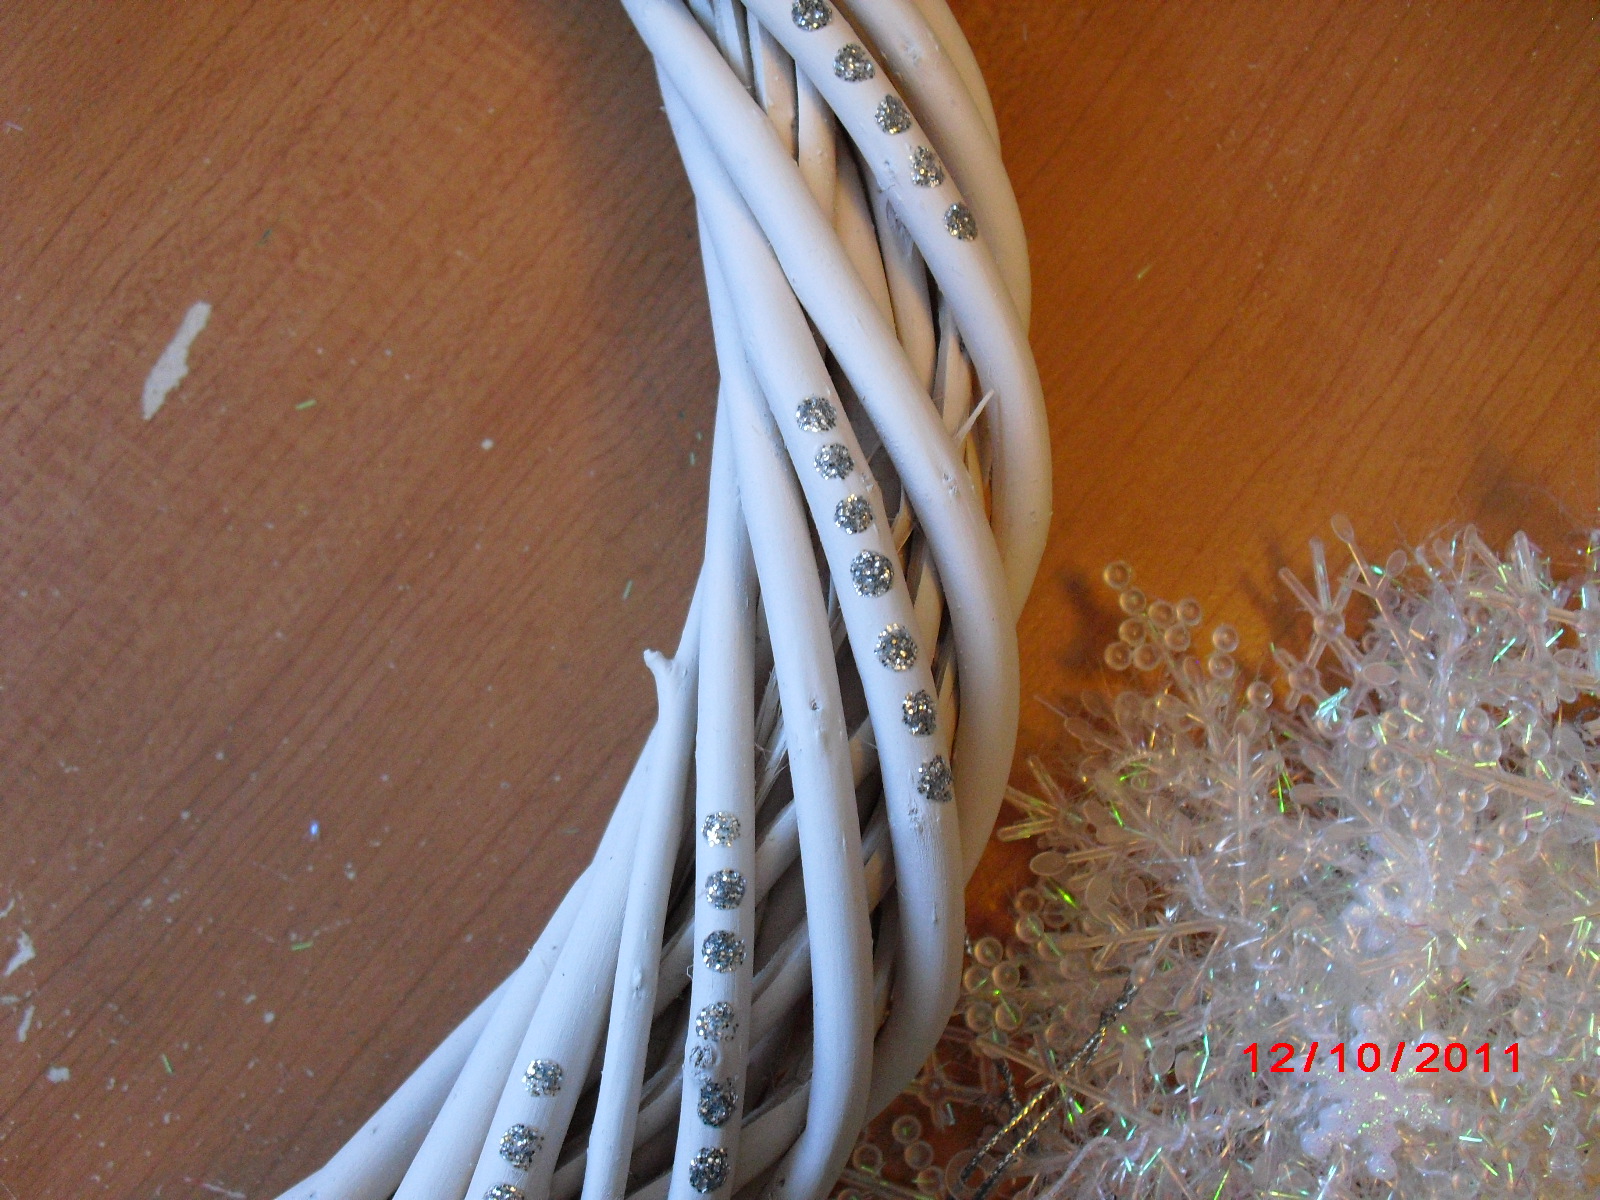
To start, I spray painted the wreath white, then added my silver glitter/Mod Podge mixture, just to give it a little more zing.
Adding some tiny snowflakes from a strand of garland to the center of the snowflakes was almost too easy. I cut off the silver strings and put them aside for my homemade tags.
When the glue was dry, I added more glitter to the tiny centers, this time a color more like freshly fallen frozen snow in the early morning sun.
After everything was dry, I placed the snowflakes around the wreath until they looked right. Out came the glue gun. One by one, the snowflakes got glued down. A small length of heavy cord is the hanger. Done!
I know fancy, and this isn't it, but it gets the job done.
And everything came from the dollar store!
Toodles.
Cowland Studio
So, why do I keep trying?
Wreaths are just so cool, so neat, so simplistically homey. Who doesn't like a wreath?
A few packages of cute snowflakes from the dollar store called my name, with a blank grapevine wreath whispering at me from home. The idea for a Christmas wreath was born.
This is a simple project, and it didn't tax my tired brain so much that I gave up. It was Plain Jane from the start.
To start, I spray painted the wreath white, then added my silver glitter/Mod Podge mixture, just to give it a little more zing.
Adding some tiny snowflakes from a strand of garland to the center of the snowflakes was almost too easy. I cut off the silver strings and put them aside for my homemade tags.
When the glue was dry, I added more glitter to the tiny centers, this time a color more like freshly fallen frozen snow in the early morning sun.
After everything was dry, I placed the snowflakes around the wreath until they looked right. Out came the glue gun. One by one, the snowflakes got glued down. A small length of heavy cord is the hanger. Done!
I know fancy, and this isn't it, but it gets the job done.
And everything came from the dollar store!
Toodles.
Cowland Studio
Saturday, December 10, 2011
Make a Glittered Ornament
the fast and easy way!
Here is what you will need:
a blank ornament (glass or wood, plastic, or handmade)
Mod Podge Gloss
glitter of your choice
a brush to apply your mixture
a toothpick to stir your mixture
You can make your own design and transfer it to your ornament, or you can just use your imagination and let the brush go.
Ready?
Let's get started. Christmas is coming- fast!
Pour some Mod Podge into a small container that has a tight fitting lid, so that you can use your mixture again. You'll be surprised at all the places you can put a little glitter on to spice up the holiday.
Add some glitter to the Mod Podge. I always use half Mod Podge and half glitter for that full on shiny effect!
Great! Now, stir them together with your toothpick. Does it look like the right consistency to you? Will it be enough? Don't worry. If you don't get the coverage you wanted the first time, wait for it to dry and apply a second coat. It's so easy!
Okay! Before you start to apply your glitter, make sure your ornament is clean. If you are painting on glass, use isopropyl alcohol to wipe it clean and let it dry. That only takes a few minutes. Make sure you don't have any grease on your hands, unless you intend to wear latex gloves. You don't want all your hard work to slide off the glass, now, do you?
If you have a design that you want to paint, transfer it to the ornament. With glass ornaments, I recommend resting the ornament on a soft surface while you are painting, and have something to set it in to dry. Paint small sections at a time. Let it dry (say- 15 minutes), and then paint another section. It might sound tedious, but the end result will make you smile! You'll be glad you put in a little extra time for drying in between painting.
Here's the ornament I started.
The design goes all the way around the glass, and there's room for more around the middle. Don't feel obligated to paint the bottom of the ornament if you don't want to. I don't recall anyone turning them to see what's on the bottom! You're going for effect here. Glitter is the key, and that's what you concentrate on. For a little splash on this one, I used gold metallic for the dots, just for something different and to accent the glitter. Metallic pens work, also. The type of glitter pens I have come right off, so I reserve them for tags and cards.
Mod Podge can tend to be tacky, even after it's dry, but with a half glitter, half MP mixture, I haven't felt any tackiness to worry about, and the glitter hasn't lifted off at all. A rainbow of color mixtures, all ready to use, line the back of my work desk. And, there are so many places you can use this simple little mixture for some major flashy effects. I put some on a Snowman nightlight. Here's a picture of gold glitter just around the edge of a candle holder.
Once the glitter bug bites, you are all set and ready to go!
And your ornament will look stunning on your tree!
I hope this little post helps you along with your special projects this holiday season. Let me know what you've glitzed up!
Toodles.
Cowland Studio
Here is what you will need:
a blank ornament (glass or wood, plastic, or handmade)
Mod Podge Gloss
glitter of your choice
a brush to apply your mixture
a toothpick to stir your mixture
You can make your own design and transfer it to your ornament, or you can just use your imagination and let the brush go.
Ready?
Let's get started. Christmas is coming- fast!
Pour some Mod Podge into a small container that has a tight fitting lid, so that you can use your mixture again. You'll be surprised at all the places you can put a little glitter on to spice up the holiday.
Add some glitter to the Mod Podge. I always use half Mod Podge and half glitter for that full on shiny effect!
Great! Now, stir them together with your toothpick. Does it look like the right consistency to you? Will it be enough? Don't worry. If you don't get the coverage you wanted the first time, wait for it to dry and apply a second coat. It's so easy!
Okay! Before you start to apply your glitter, make sure your ornament is clean. If you are painting on glass, use isopropyl alcohol to wipe it clean and let it dry. That only takes a few minutes. Make sure you don't have any grease on your hands, unless you intend to wear latex gloves. You don't want all your hard work to slide off the glass, now, do you?
If you have a design that you want to paint, transfer it to the ornament. With glass ornaments, I recommend resting the ornament on a soft surface while you are painting, and have something to set it in to dry. Paint small sections at a time. Let it dry (say- 15 minutes), and then paint another section. It might sound tedious, but the end result will make you smile! You'll be glad you put in a little extra time for drying in between painting.
Here's the ornament I started.
The design goes all the way around the glass, and there's room for more around the middle. Don't feel obligated to paint the bottom of the ornament if you don't want to. I don't recall anyone turning them to see what's on the bottom! You're going for effect here. Glitter is the key, and that's what you concentrate on. For a little splash on this one, I used gold metallic for the dots, just for something different and to accent the glitter. Metallic pens work, also. The type of glitter pens I have come right off, so I reserve them for tags and cards.
Mod Podge can tend to be tacky, even after it's dry, but with a half glitter, half MP mixture, I haven't felt any tackiness to worry about, and the glitter hasn't lifted off at all. A rainbow of color mixtures, all ready to use, line the back of my work desk. And, there are so many places you can use this simple little mixture for some major flashy effects. I put some on a Snowman nightlight. Here's a picture of gold glitter just around the edge of a candle holder.
Once the glitter bug bites, you are all set and ready to go!
And your ornament will look stunning on your tree!
I hope this little post helps you along with your special projects this holiday season. Let me know what you've glitzed up!
Toodles.
Cowland Studio
Wednesday, December 7, 2011
This Doesn't Happen Often...
But, it did just a few days ago. Normally, when I see something in my head, the project comes out almost exactly as I pictured it. Trial and error, experimenting with paints and mediums, and all sorts of other activities can go into something that I've thought of. Thinking of all the in and outs, ups and downs, and major booboos that can happen take up time, often to the point where I just put the project aside and move on. The discarded project will 'float' around in my head. Either I find a way to do it, or I don't.
Usually, I do.
Not so this time. Here's a picture of what I had hoped would look more like an icicle than it does.
Ah, well. The hook didn't do what I wanted it to, either. I'll leave it around for a while to remind that not everything I think of is a good idea!
I hope your handmade Christmas ornaments are going well!
Toodles.
Cowland Studio
Usually, I do.
Not so this time. Here's a picture of what I had hoped would look more like an icicle than it does.
| Pretty sad, huh? |
I hope your handmade Christmas ornaments are going well!
Toodles.
Cowland Studio
Wednesday, November 30, 2011
Recycling Solves Simple Problems
More and more, I find myself finding uses for items that have already been purchased and used once. Is there another use for the used? Everyone seems to be coming up with some ingenious ideas for things that would ordinarily end up in the landfill, and that's a great happening!
Here is the dish with the stone spray, now sporting a coat of gold metallic glaze.
In a pinch, use it for wrapped candy or shelled nuts. Who doesn't have shelled nuts in a dish hanging around at this time of year? Somehow, without one bristling with nut crackers and picks and shelled walnuts (that no one eats), it's just not the holiday season. Sort of lower case and dull.
We have a love affair with bath soap in this house. The lower ledge of the tub had been filling up with pieces and parts that hadn't made it to the soap sock (made with a real sock!), and the risk of them spilling into the tub had been growing daily. Finding a soap dish to hold all those pieces and parts was a lost cause, and I gave up looking. I didn't want to chance getting a glass dish. None of the plastic bowls suitable for the job matched my bathroom. So, I went into my 'zoning' mode and let my brain sort it out without me.
It finally did.
My stash of gently used, fairly heavy plastic dishes is towering in my studio, filling up an apple tote. One day, I pulled out a round bowl and immediately decided this would make the ideal soap dish for the tub ledge. But, it needed some decoration. There is a narrow dividing wall in my bathroom with a pretty glass panel painted with art nouveau flowers. This design has been in the back of my mind for a long time, and someday I intend to decorate the shower curtain and toothbrush holder with those same flowers.
Why not start now, just to see how it goes?
Matching colors was easy, so I started with the bronze metallic for the petals. Copper metallic was the shading color, with expresso and royal gold for the remaining parts.
Here is the finished soap dish:
Disjointed, I know, but who said I had to follow the flower pattern exactly? There is no clear spray on the tray, so we will see how long it lasts. And who needs more chemicals on their skin? Certainly not me!
This little project isn't recycled, but it wanted to be featured on this post.
I purchased a package of small Christmas sun catchers at the dollar store. They were cute. I didn't already have them. And I knew just what to do to spiff them up.
Cute, aren't they? They came with their own tiny pots of sun catcher paint, but that wouldn't do. Nope. Not for these cuties destined for the bedroom window- to catch the sun!
I used some metallics, but I wanted glitter on them, too. Their window faces south. Enough said. All of my many pots of glitter clutter my work desk right now, and they fit the bill. Using tiny paint pots I had recently bought at the dollar store, I starting mixing. Over the past couple of weeks, I have discovered a few mediums to suspend glitter in, but this time I used Mod Podge Gloss as the medium. Each pot is half MP, half glitter. More glitter, more bling! They're now ready, sitting on the shelf waiting for decorations to be hung.
It was one of those 'I need to do some no-thinking painting' days, especially after a major disaster with a frosted glass ornament.
Can you guess what this will be?
One hint- the middle piece is cut from an empty milk jug. Note the paper clip.
You'll see the completed project in the next post.
Toodles.
Here is the dish with the stone spray, now sporting a coat of gold metallic glaze.
In a pinch, use it for wrapped candy or shelled nuts. Who doesn't have shelled nuts in a dish hanging around at this time of year? Somehow, without one bristling with nut crackers and picks and shelled walnuts (that no one eats), it's just not the holiday season. Sort of lower case and dull.
We have a love affair with bath soap in this house. The lower ledge of the tub had been filling up with pieces and parts that hadn't made it to the soap sock (made with a real sock!), and the risk of them spilling into the tub had been growing daily. Finding a soap dish to hold all those pieces and parts was a lost cause, and I gave up looking. I didn't want to chance getting a glass dish. None of the plastic bowls suitable for the job matched my bathroom. So, I went into my 'zoning' mode and let my brain sort it out without me.
It finally did.
My stash of gently used, fairly heavy plastic dishes is towering in my studio, filling up an apple tote. One day, I pulled out a round bowl and immediately decided this would make the ideal soap dish for the tub ledge. But, it needed some decoration. There is a narrow dividing wall in my bathroom with a pretty glass panel painted with art nouveau flowers. This design has been in the back of my mind for a long time, and someday I intend to decorate the shower curtain and toothbrush holder with those same flowers.
Why not start now, just to see how it goes?
| The 1st step |
Here is the finished soap dish:
Disjointed, I know, but who said I had to follow the flower pattern exactly? There is no clear spray on the tray, so we will see how long it lasts. And who needs more chemicals on their skin? Certainly not me!
This little project isn't recycled, but it wanted to be featured on this post.
I purchased a package of small Christmas sun catchers at the dollar store. They were cute. I didn't already have them. And I knew just what to do to spiff them up.
Cute, aren't they? They came with their own tiny pots of sun catcher paint, but that wouldn't do. Nope. Not for these cuties destined for the bedroom window- to catch the sun!
I used some metallics, but I wanted glitter on them, too. Their window faces south. Enough said. All of my many pots of glitter clutter my work desk right now, and they fit the bill. Using tiny paint pots I had recently bought at the dollar store, I starting mixing. Over the past couple of weeks, I have discovered a few mediums to suspend glitter in, but this time I used Mod Podge Gloss as the medium. Each pot is half MP, half glitter. More glitter, more bling! They're now ready, sitting on the shelf waiting for decorations to be hung.
It was one of those 'I need to do some no-thinking painting' days, especially after a major disaster with a frosted glass ornament.
Can you guess what this will be?
One hint- the middle piece is cut from an empty milk jug. Note the paper clip.
You'll see the completed project in the next post.
Toodles.
Thursday, November 24, 2011
On Thanksgiving Day
You've raped our Dear Mother,
degenerate child,
And you've done it for dollars
with a lie and a smile.You've poisoned her breath
and polluted her blood
With your urban erections
and the scars that you've dug.
In arrogant homage,
for pillage you pray.
Tell me- who thanks the Red Man
on Thanksgiving Day?
Is it you, mister banker,
or your well padded son?
Is it you, mister lawyer,
for some appreciation?
For the Nations you've leveled,
for your plastic display-
Just who are you thanking
on Thanksgiving Day?
Copyright 2011 W. D. Ahl
This poem was written by my husband, and given to me as a gift. It is the most profound and moving gift I have ever received.
Thank you, baby. I cherish it always.
Have a wonderful day, everyone!
Toodles.
Cowland Studio
Sunday, November 13, 2011
Experiments and Projects
Clay is fascinating.
Clay is fun.
Clay is frustrating.
But I keep at it. And now with Stroppel Cane on the scene, it doesn't matter how absolutely awful my canes are! They can be put to use in the process called Stroppel Cane, developed by Alice Stroppel. Thank you, Alice! After playing with cane and nearly throwing it at the wall, I tried Alice's method and here is what it looks like:
When I decide how to apply it, I'll get back to it. Until then, clay is on a vacation, cooling its jets in the cabinet.
Ever since I read a post or two on making stamps, I've been on a journey of experimenting and testing. Pictured next are the finals I have found to be the best for me.
All they need is mounting, which will be on hard packed styrofoam.
Wanting them only for backgrounding, I started going through my millions of designs, both new and from my tattoo artist days. Talk about unlimited! I've drawn my own Native American designs for decades, and they're all compiled in a few file folders neatly tucked away in my file drawer. They'll be wonderful for making leather projects. Here's a little shot of some that are ready to make:
As always- the possibilities are endless...
Sitting still in dialysis is hard on me and very cold for my left arm, so I set about crocheting an arm warmer. After finding my favorite purple shade, I got right to it and finished it in time the next morning for a trial run.
Chaining 30, I used half double crochet stitches across and for all successive rows until the piece reached from my finger tips to elbow.
Now it's ready to stitch two sides.
A few minutes later, it was done.
The Arm Sock- aka The Purple Flipper.
It works for me.
Hubby likes the Marie Callender meals on those days I'm too tired to cook (bless him!), and I started washing them to keep for anything they might be used for. Who knows? I happened to look at my stock of spray paints, and the Stone Spray caught my eye. Hm. Why not?
Two coats, and here is what it looks like now:
It seems to want something more, so I think I'm going to try a gold metallic varnish over the spray. What do you think? Any suggestions? I'm open.
Working on a Christmas order, I got to the point where I had to wait for paint to dry, so I decided to see what could be done for Christmas tags. Grabbing some leftover recycled paper from a card I made, the contoured (?) scissors went to work. Only two of the four I bought work well enough to use, but all four were only a dollar, so no complaints here! I had just picked up a tiny snowflake punch, so it went to work, too. This is what I whipped up in five minutes:
It's a start. The labels I designed will be put to use on this end. Don't you love double duty?
Not long ago, I came up with a simple process of applying glitter. It's been under evaluation for about two months now, and it hasn't lost any glitter or shine. Finally!! Something simple and fairly cheap to use on ornaments. It also works on fabric, because I tested it there, also. Can you guess what I'll use on my two new purple Tshirts?
So, here is a start on an ornament I'm working on. It's more or less experimental, as I'm testing graphite papers for transfers. I'm looking for the easiest way to transfer a design and have the lines disappear during the painting process, even if I'm using transparent paint. So far, it looks like the grey graphite paper, when traced very lightly, is the winner. Take a look:
And so, experimenting goes on and on. I don't think I'll ever exhaust all the possibilities in my studio. There are so many things to paint on and so many things to paint with! And I love it.
Today is cookie day for me- great grandma's Soft Molasses Cookies are on the menu. Then, I need to take some pictures, now that my old Singer and Shiny Brites are here. How did we accumulate so many boxes of Christmas stuff? Really- it was a truck load!
The sun is out.
Toodles.
Cowland Studio
Clay is fun.
Clay is frustrating.
But I keep at it. And now with Stroppel Cane on the scene, it doesn't matter how absolutely awful my canes are! They can be put to use in the process called Stroppel Cane, developed by Alice Stroppel. Thank you, Alice! After playing with cane and nearly throwing it at the wall, I tried Alice's method and here is what it looks like:
| Right or wrong side |
| Wrong or right side |
Ever since I read a post or two on making stamps, I've been on a journey of experimenting and testing. Pictured next are the finals I have found to be the best for me.
All they need is mounting, which will be on hard packed styrofoam.
Wanting them only for backgrounding, I started going through my millions of designs, both new and from my tattoo artist days. Talk about unlimited! I've drawn my own Native American designs for decades, and they're all compiled in a few file folders neatly tucked away in my file drawer. They'll be wonderful for making leather projects. Here's a little shot of some that are ready to make:
As always- the possibilities are endless...
Sitting still in dialysis is hard on me and very cold for my left arm, so I set about crocheting an arm warmer. After finding my favorite purple shade, I got right to it and finished it in time the next morning for a trial run.
Chaining 30, I used half double crochet stitches across and for all successive rows until the piece reached from my finger tips to elbow.
| The hook size- 'J' |
A few minutes later, it was done.
The Arm Sock- aka The Purple Flipper.
It works for me.
Hubby likes the Marie Callender meals on those days I'm too tired to cook (bless him!), and I started washing them to keep for anything they might be used for. Who knows? I happened to look at my stock of spray paints, and the Stone Spray caught my eye. Hm. Why not?
Two coats, and here is what it looks like now:
It seems to want something more, so I think I'm going to try a gold metallic varnish over the spray. What do you think? Any suggestions? I'm open.
Working on a Christmas order, I got to the point where I had to wait for paint to dry, so I decided to see what could be done for Christmas tags. Grabbing some leftover recycled paper from a card I made, the contoured (?) scissors went to work. Only two of the four I bought work well enough to use, but all four were only a dollar, so no complaints here! I had just picked up a tiny snowflake punch, so it went to work, too. This is what I whipped up in five minutes:
It's a start. The labels I designed will be put to use on this end. Don't you love double duty?
Not long ago, I came up with a simple process of applying glitter. It's been under evaluation for about two months now, and it hasn't lost any glitter or shine. Finally!! Something simple and fairly cheap to use on ornaments. It also works on fabric, because I tested it there, also. Can you guess what I'll use on my two new purple Tshirts?
So, here is a start on an ornament I'm working on. It's more or less experimental, as I'm testing graphite papers for transfers. I'm looking for the easiest way to transfer a design and have the lines disappear during the painting process, even if I'm using transparent paint. So far, it looks like the grey graphite paper, when traced very lightly, is the winner. Take a look:
| Click the picture to enlarge to see the detail. |
Today is cookie day for me- great grandma's Soft Molasses Cookies are on the menu. Then, I need to take some pictures, now that my old Singer and Shiny Brites are here. How did we accumulate so many boxes of Christmas stuff? Really- it was a truck load!
The sun is out.
Toodles.
Cowland Studio
Subscribe to:
Posts (Atom)